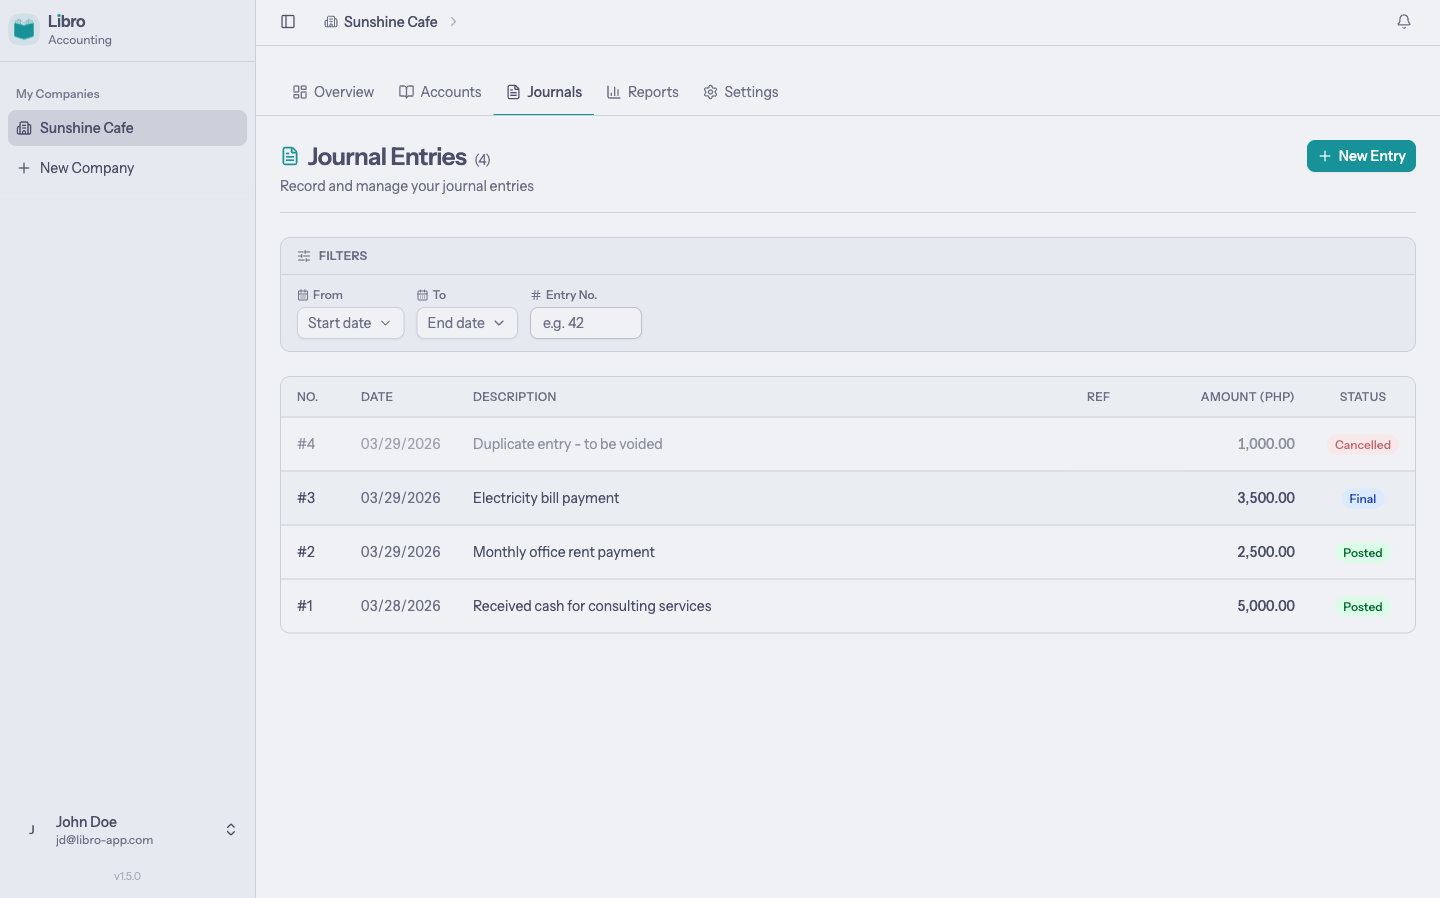
Journal Entries
Learn how to create, edit, post, and manage journal entries with double-entry bookkeeping.
Journal Entries
Journal entries are the foundation of double-entry bookkeeping. Every transaction is recorded as a balanced entry where total debits equal total credits.
Viewing your entries
The Journals page shows all your journal entries sorted by date, newest first.
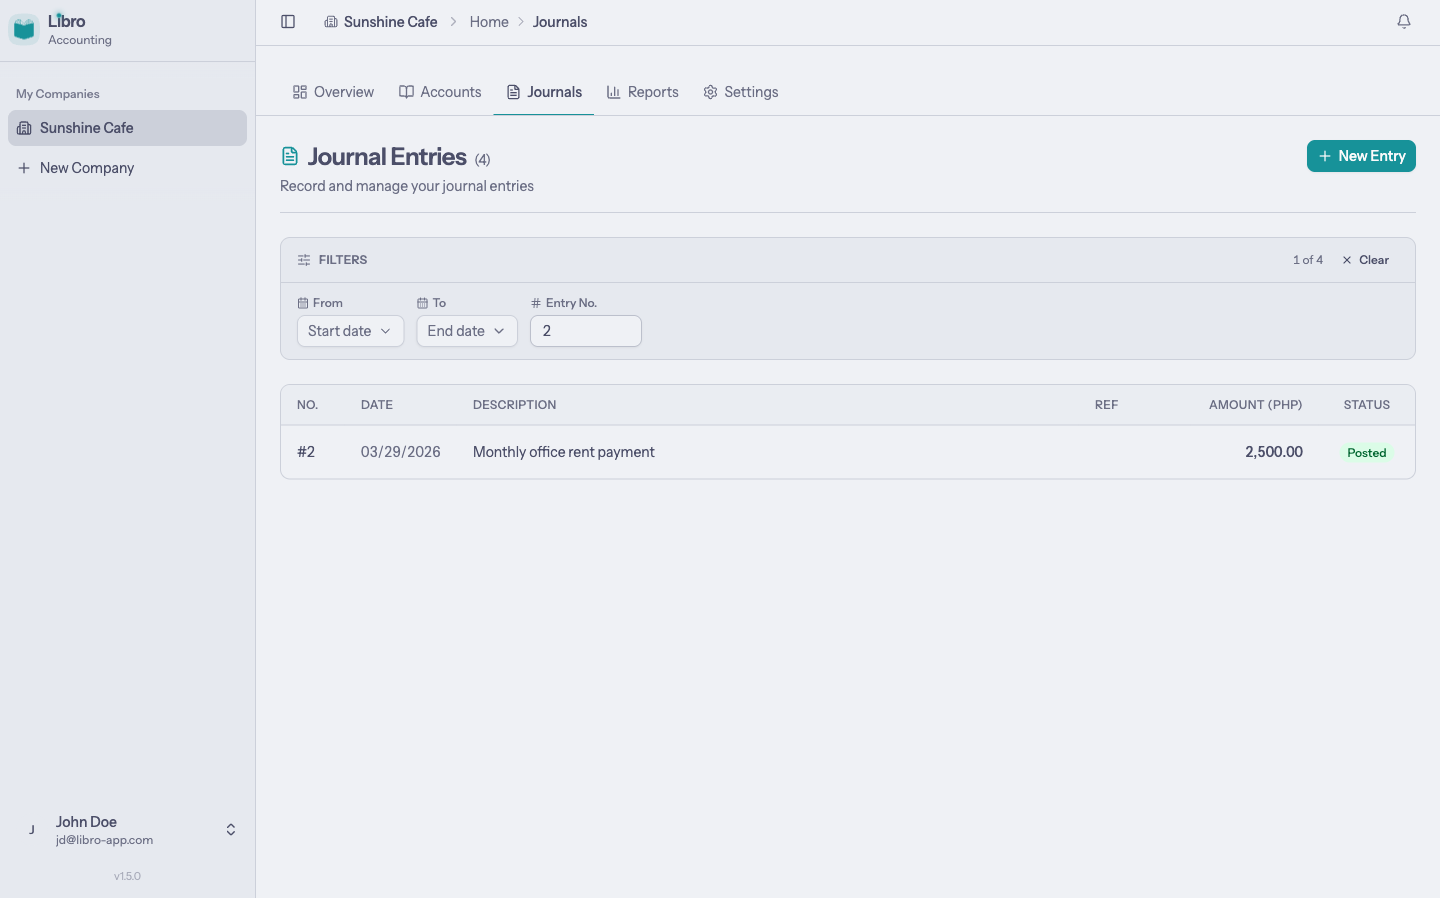
Filtering entries
Use the filters at the top to narrow down your entries:
- Date range lets you set a start and/or end date to see entries within a period
- Entry number lets you search by entry number (e.g., “42” matches #42)
Entry columns
Each entry in the list shows:
| Column | Description |
|---|---|
| No. | Auto-assigned entry number |
| Date | When the transaction occurred |
| Description | What the transaction was for |
| Ref | Optional reference (e.g., invoice number) |
| Amount | Total amount of the entry |
| Status | Current status (Draft, Posted, Final, or Cancelled) |
Creating an entry
Click New Entry to open the journal entry form.
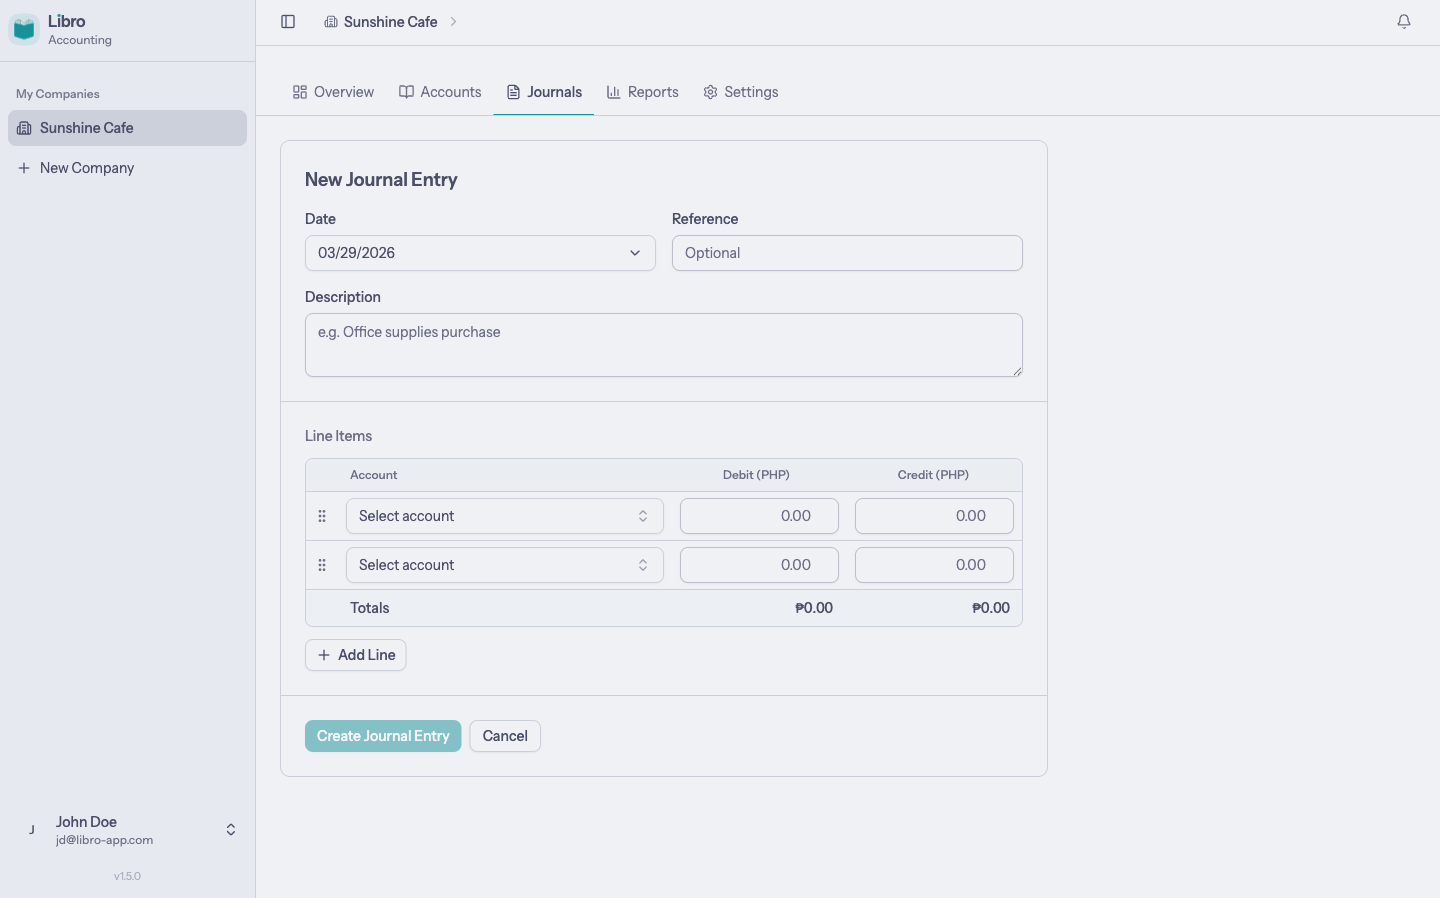
Required fields
- Date defaults to today. Click to pick a different date.
- Description explains what the transaction is about (e.g., “Office supplies purchase”).
- Line items need at least two lines with accounts and amounts.
Optional fields
- Reference is an external reference like an invoice or receipt number
Adding line items
Each line item has:
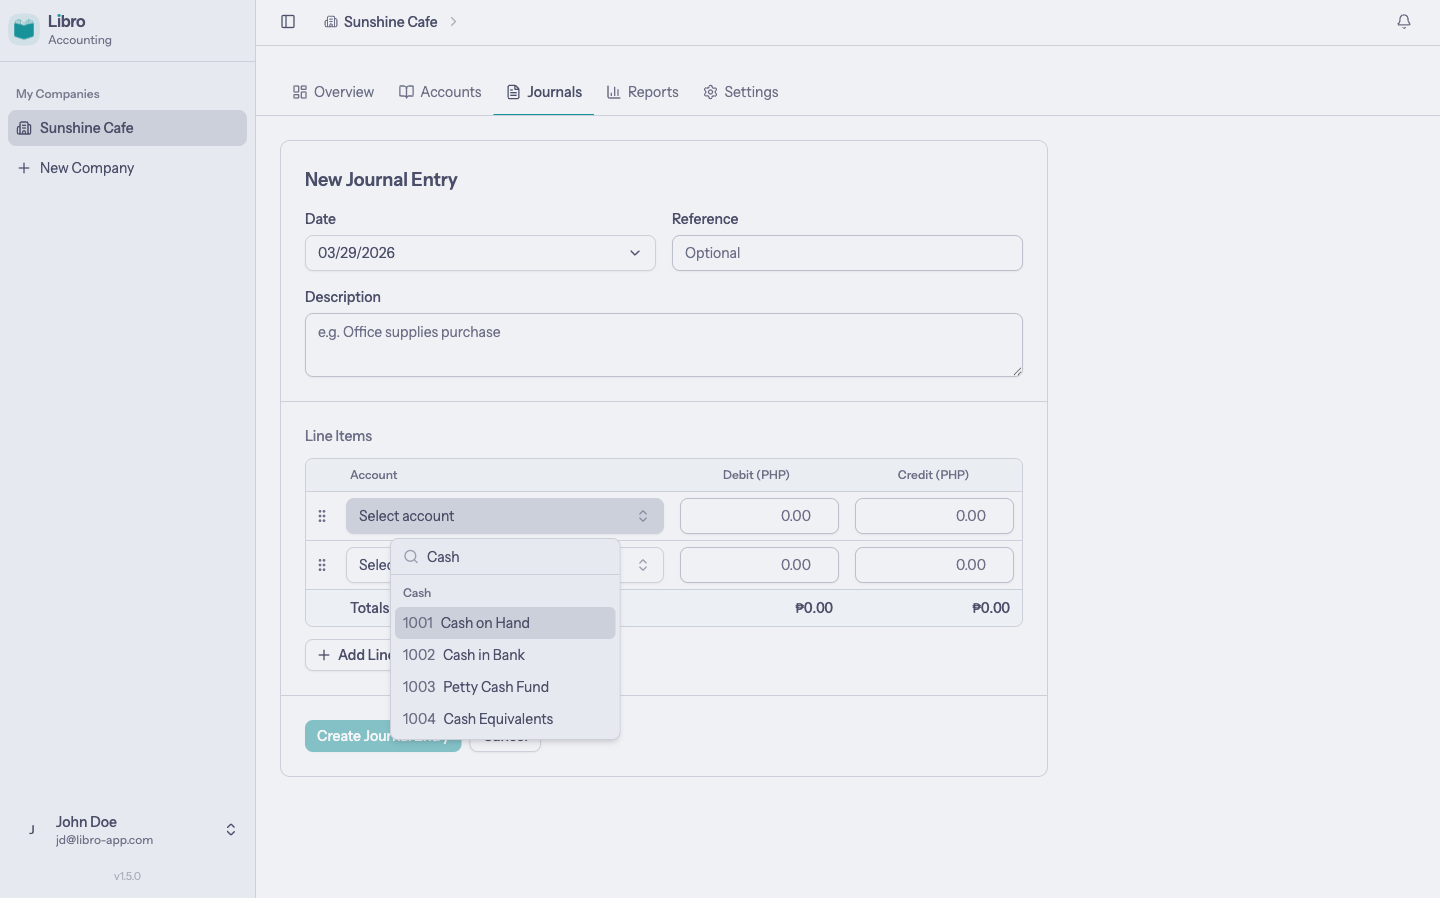
- Account lets you select from your chart of accounts using the searchable dropdown. Accounts are grouped by type (assets, liabilities, equity, revenue, expenses).
- Debit amount is the amount to debit
- Credit amount is the amount to credit
A line can have either a debit or a credit, not both.
Click Add Line to add more lines. You need at least two lines per entry.
Balance validation
Libro validates your entry in real-time. The total debits must equal the total credits. You’ll see a Balanced badge when the entry is valid, or an Unbalanced warning if the amounts don’t match.
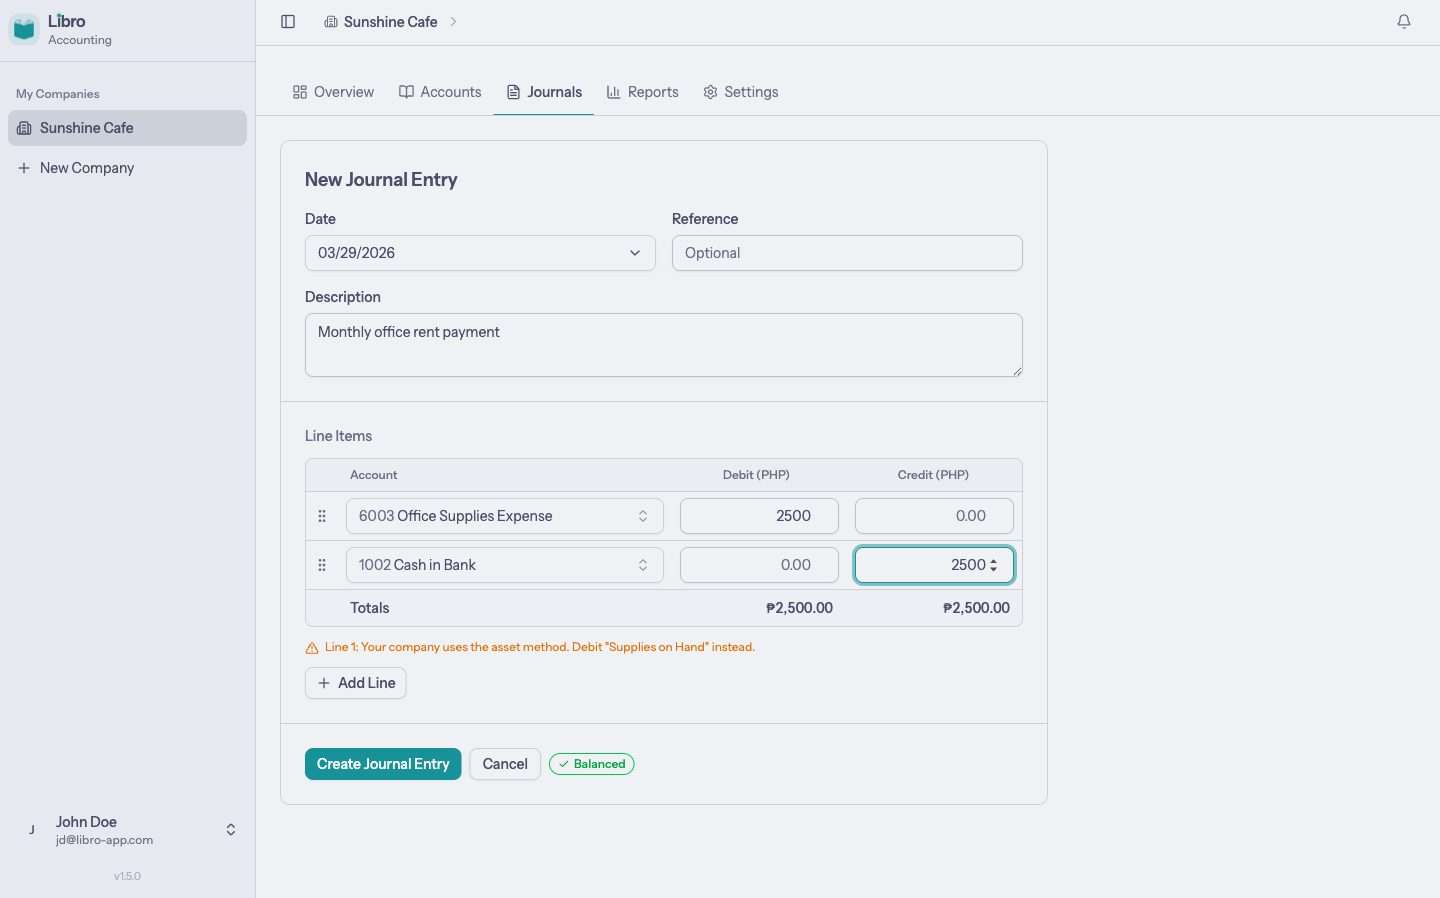
The Create Journal Entry button stays disabled until the entry is balanced and all required fields are filled.
Example: Recording rent payment
To record a PHP 10,000 rent payment by bank transfer:
| Account | Debit | Credit |
|---|---|---|
| Rent Expense | 10,000 | |
| Cash in Bank | 10,000 |
Editing an entry
Click Edit on any draft or posted entry to modify it.
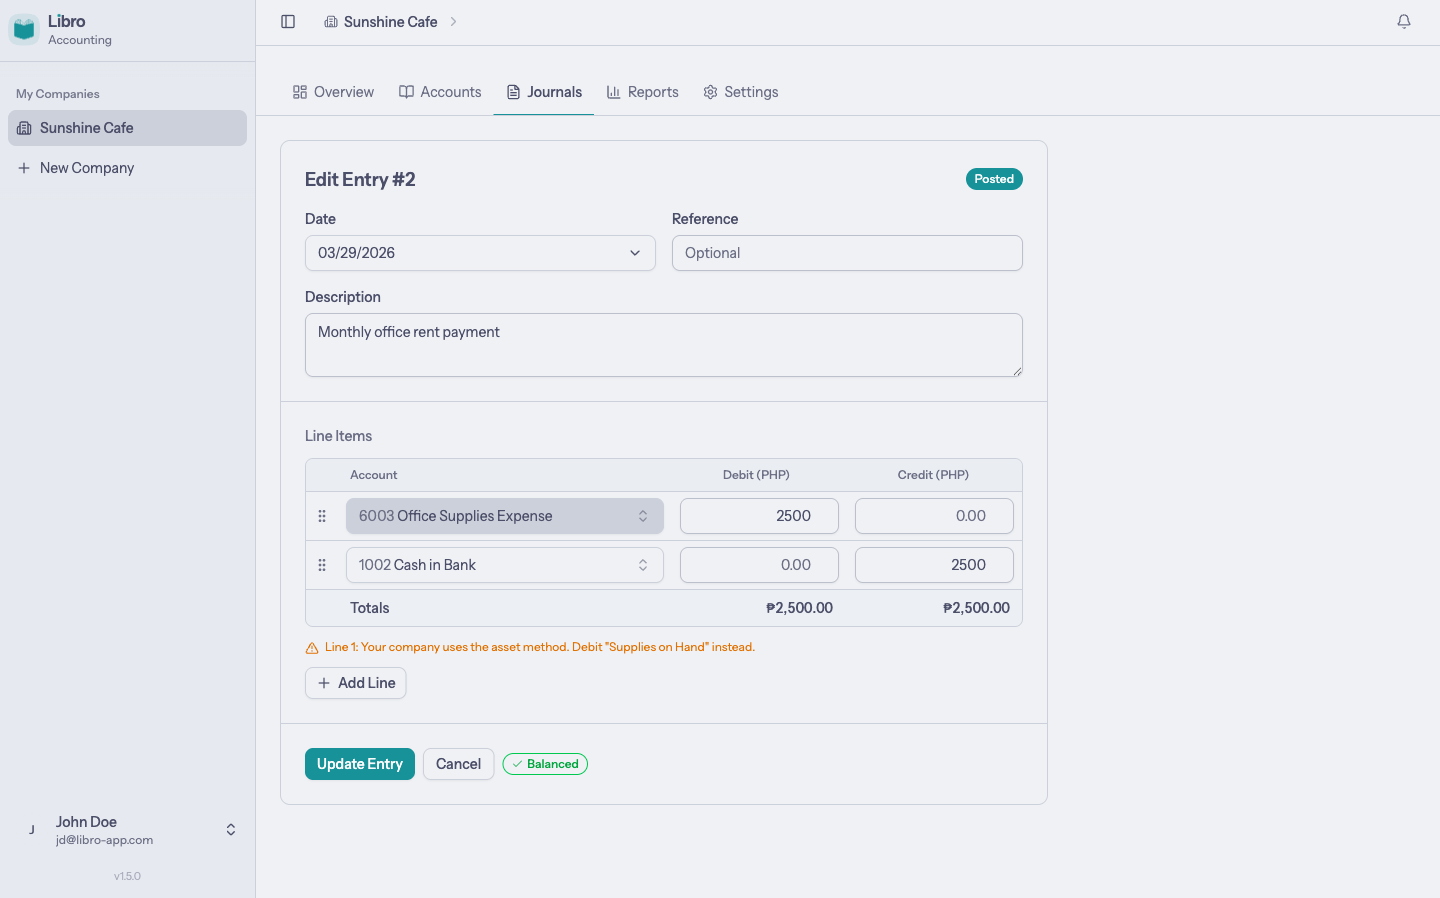
You can change the date, description, reference, and line items. The same validation rules apply. Your entry must be balanced before saving.
Editing a posted entry keeps it in posted status. You don’t need to unpost it first.
Entries with Final or Cancelled status cannot be edited.
Entry detail view
Click any entry in the list to see its full details.

The detail view shows:
- Entry number and status badge
- Date and creation date
- Reference (if provided)
- All line items with account names, codes, and amounts
- Total debits and credits
Entry statuses
Every journal entry has one of four statuses that control what you can do with it.
Draft
New entries start as drafts. You can freely edit, post, or cancel a draft.
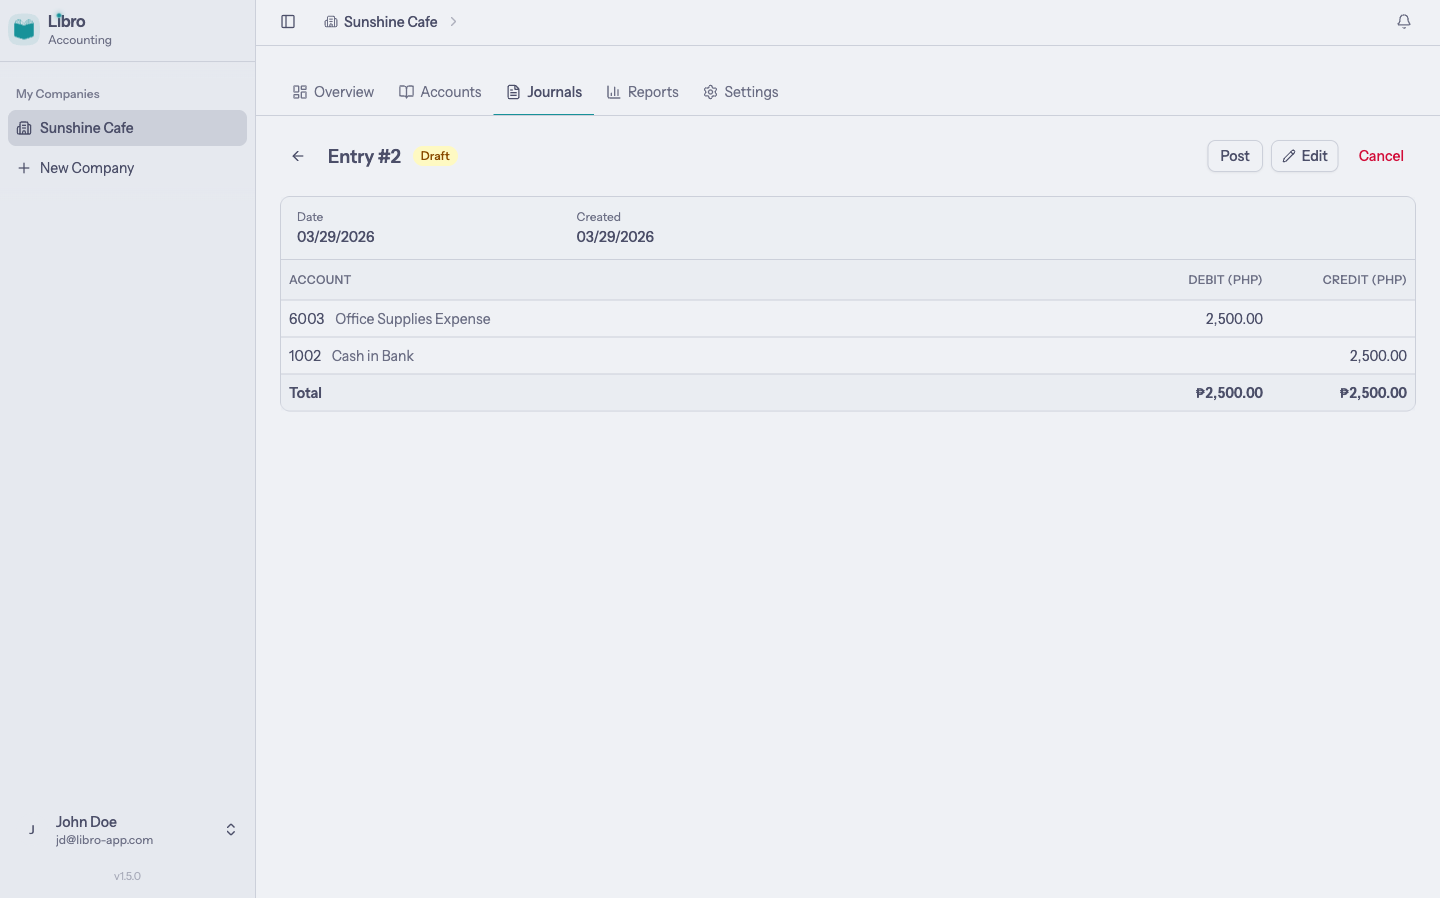
Available actions: Post, Edit, Cancel
Posted
Posted entries affect your account balances and show up in reports. You can still edit a posted entry, unpost it back to draft, finalize it, or cancel it.
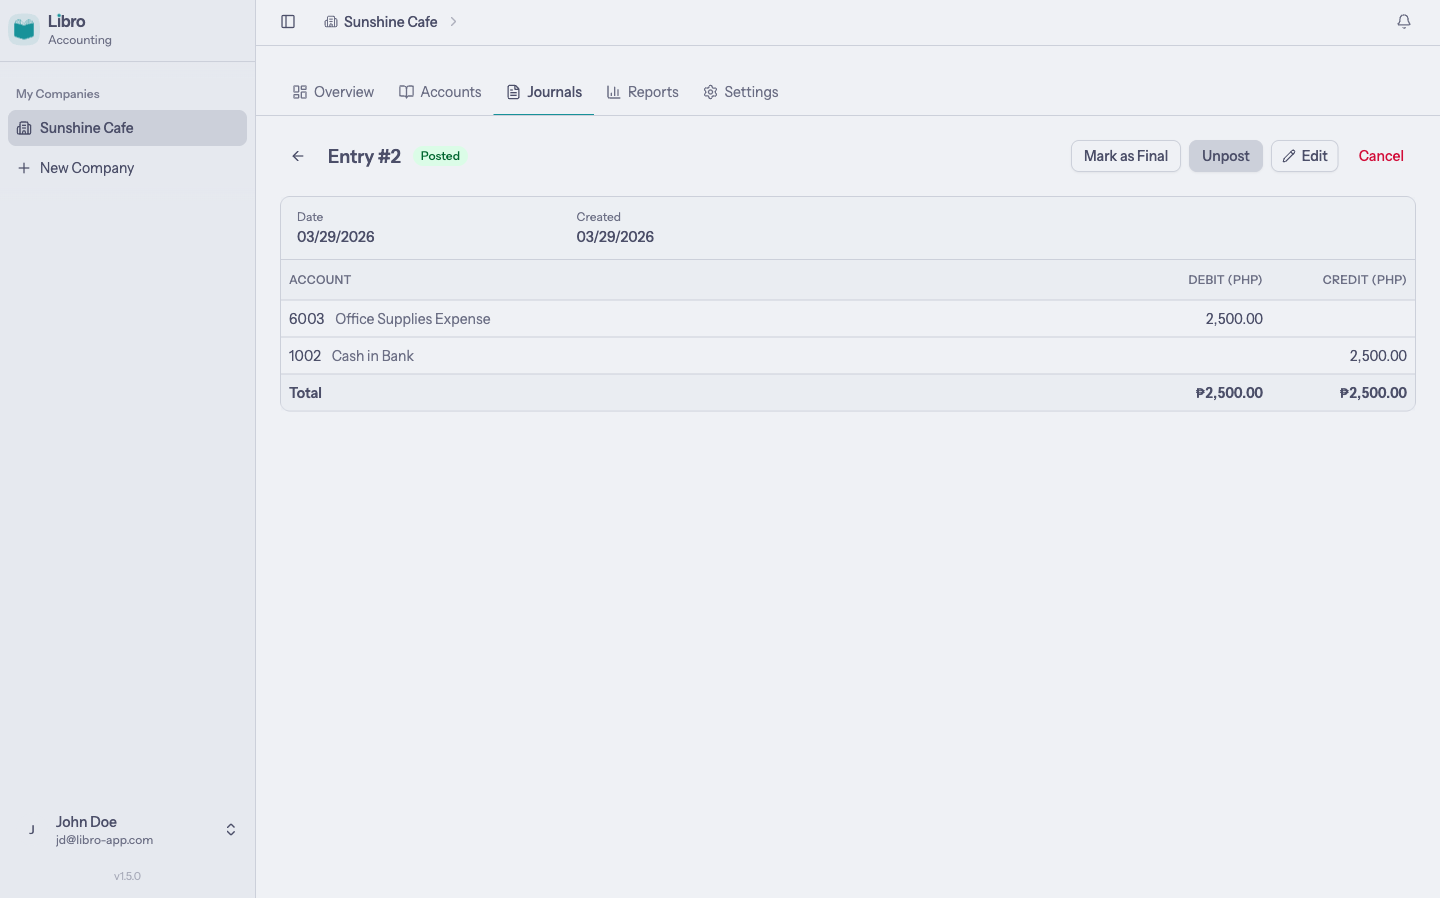
Available actions: Mark as Final, Unpost, Edit, Cancel
Final
Finalizing an entry locks it permanently. This is useful for entries you’ve confirmed are correct and don’t want anyone to change. Final entries cannot be edited, cancelled, or reverted.

Available actions: None (read-only)
Cancelled
Cancelling an entry voids it. Cancelled entries remain visible in your list (with reduced opacity) for audit trail purposes, but they no longer affect your account balances.
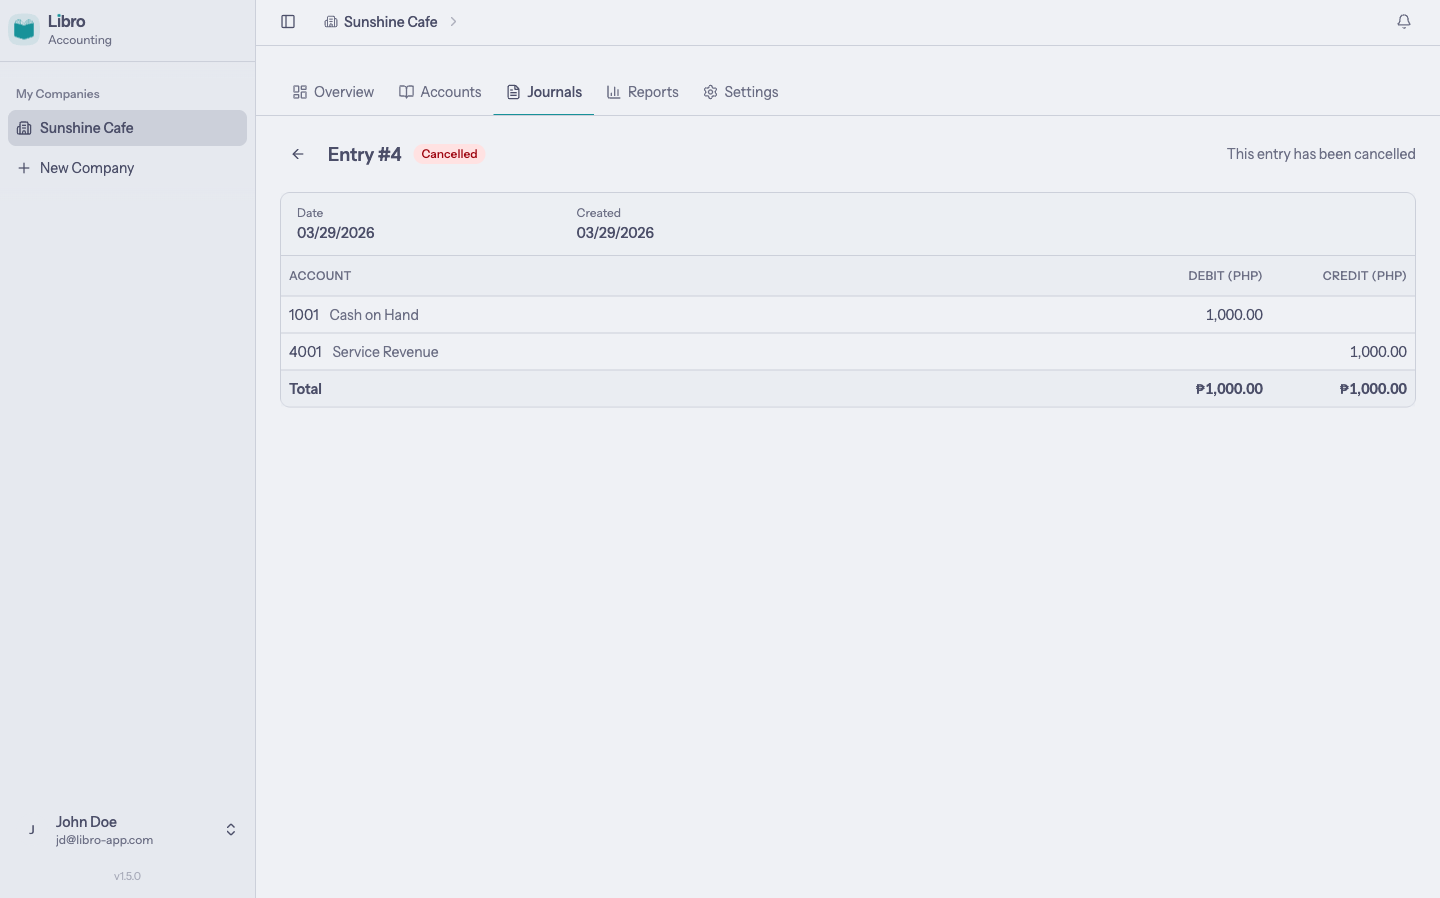
Available actions: None (read-only)
Status flow
Draft ──→ Posted ──→ Final
  │          │
  │          ├──→ Draft (unpost)
  │          │
  └──→ Cancelled ←── Posted
Tips
- Use references to link entries to invoices, receipts, or purchase orders for easier tracking
- Post entries once you’ve verified they’re correct. Only posted and final entries appear in reports.
- Don’t finalize too early. Finalization is permanent. Keep entries as posted until you’re sure they won’t need changes.
- Cancelled entries aren’t deleted. They stay in your records as an audit trail. If you made a mistake, cancel the entry and create a new corrected one.